


The
VIEW OUR TRAVEL PHOTO ALBUM >
May 2, 2016
Wedding Photography Tips: How to Shoot Engagement Rings
Filed in: Education
How to Shoot Engagement Rings
Hi friends! Today we are so excited to share our secrets of how to shoot engagement rings! Rings are some of the prettiest details, but can also be the trickiest things to photograph! There’s more to it than just setting them on the counter and snapping away!
So we are going to dive into exactly how to shoot engagement rings. We’ll cover the best time to photograph the rings, where to photograph them, the surface we use and how we light and shoot them. As you know, we absolutely LOVE detail photos and photographing rings is one of our favorite things. They hold such an important role in the story of an engagement and wedding, and they’re beautiful!
Here are a few ring shots we took during this weekend’s engagement shoot. We’ll show you in detail how we styled and shot it. But first, just take a look at this gorgeous ring:

Isn’t this ring beautiful?
The best way to shoot these tiny details is to get on their level and treat them as if they are in their own little world.
Timing
We photographed these details as our bride was getting her makeup done. We prefer to photograph the details during the “getting ready” time because it acts as a slight warm up for the rest of the day. Plus, if you shoot the rings first, you don’t have to worry about juggling rings at the end of the day, or asking the bride and groom to take their rings off after the ceremony 😉
During engagement shoots, there is a lot more flexibility with the timing–we usually grab the ring shots when our couples are changing into their second outfits.
Lighting
We prefer to shoot with natural light even for our detail shots, so we always strive to find beautiful window light or soft open shade outside.
For the ring shots shown above, we placed the ring next to a giant window with a lot of beautiful soft light coming through. We’ve included a behind-the-scenes photo of our little set up below.

As you can see, the main light source is coming from the right through the window. We prefer our main light source to come from a slight angle rather than straight on because it creates depth. Remember that: light coming from an angle creates shadows, and shadows help create depth.
See how the duvet has so much depth and texture on it because of the shadows and highlights?
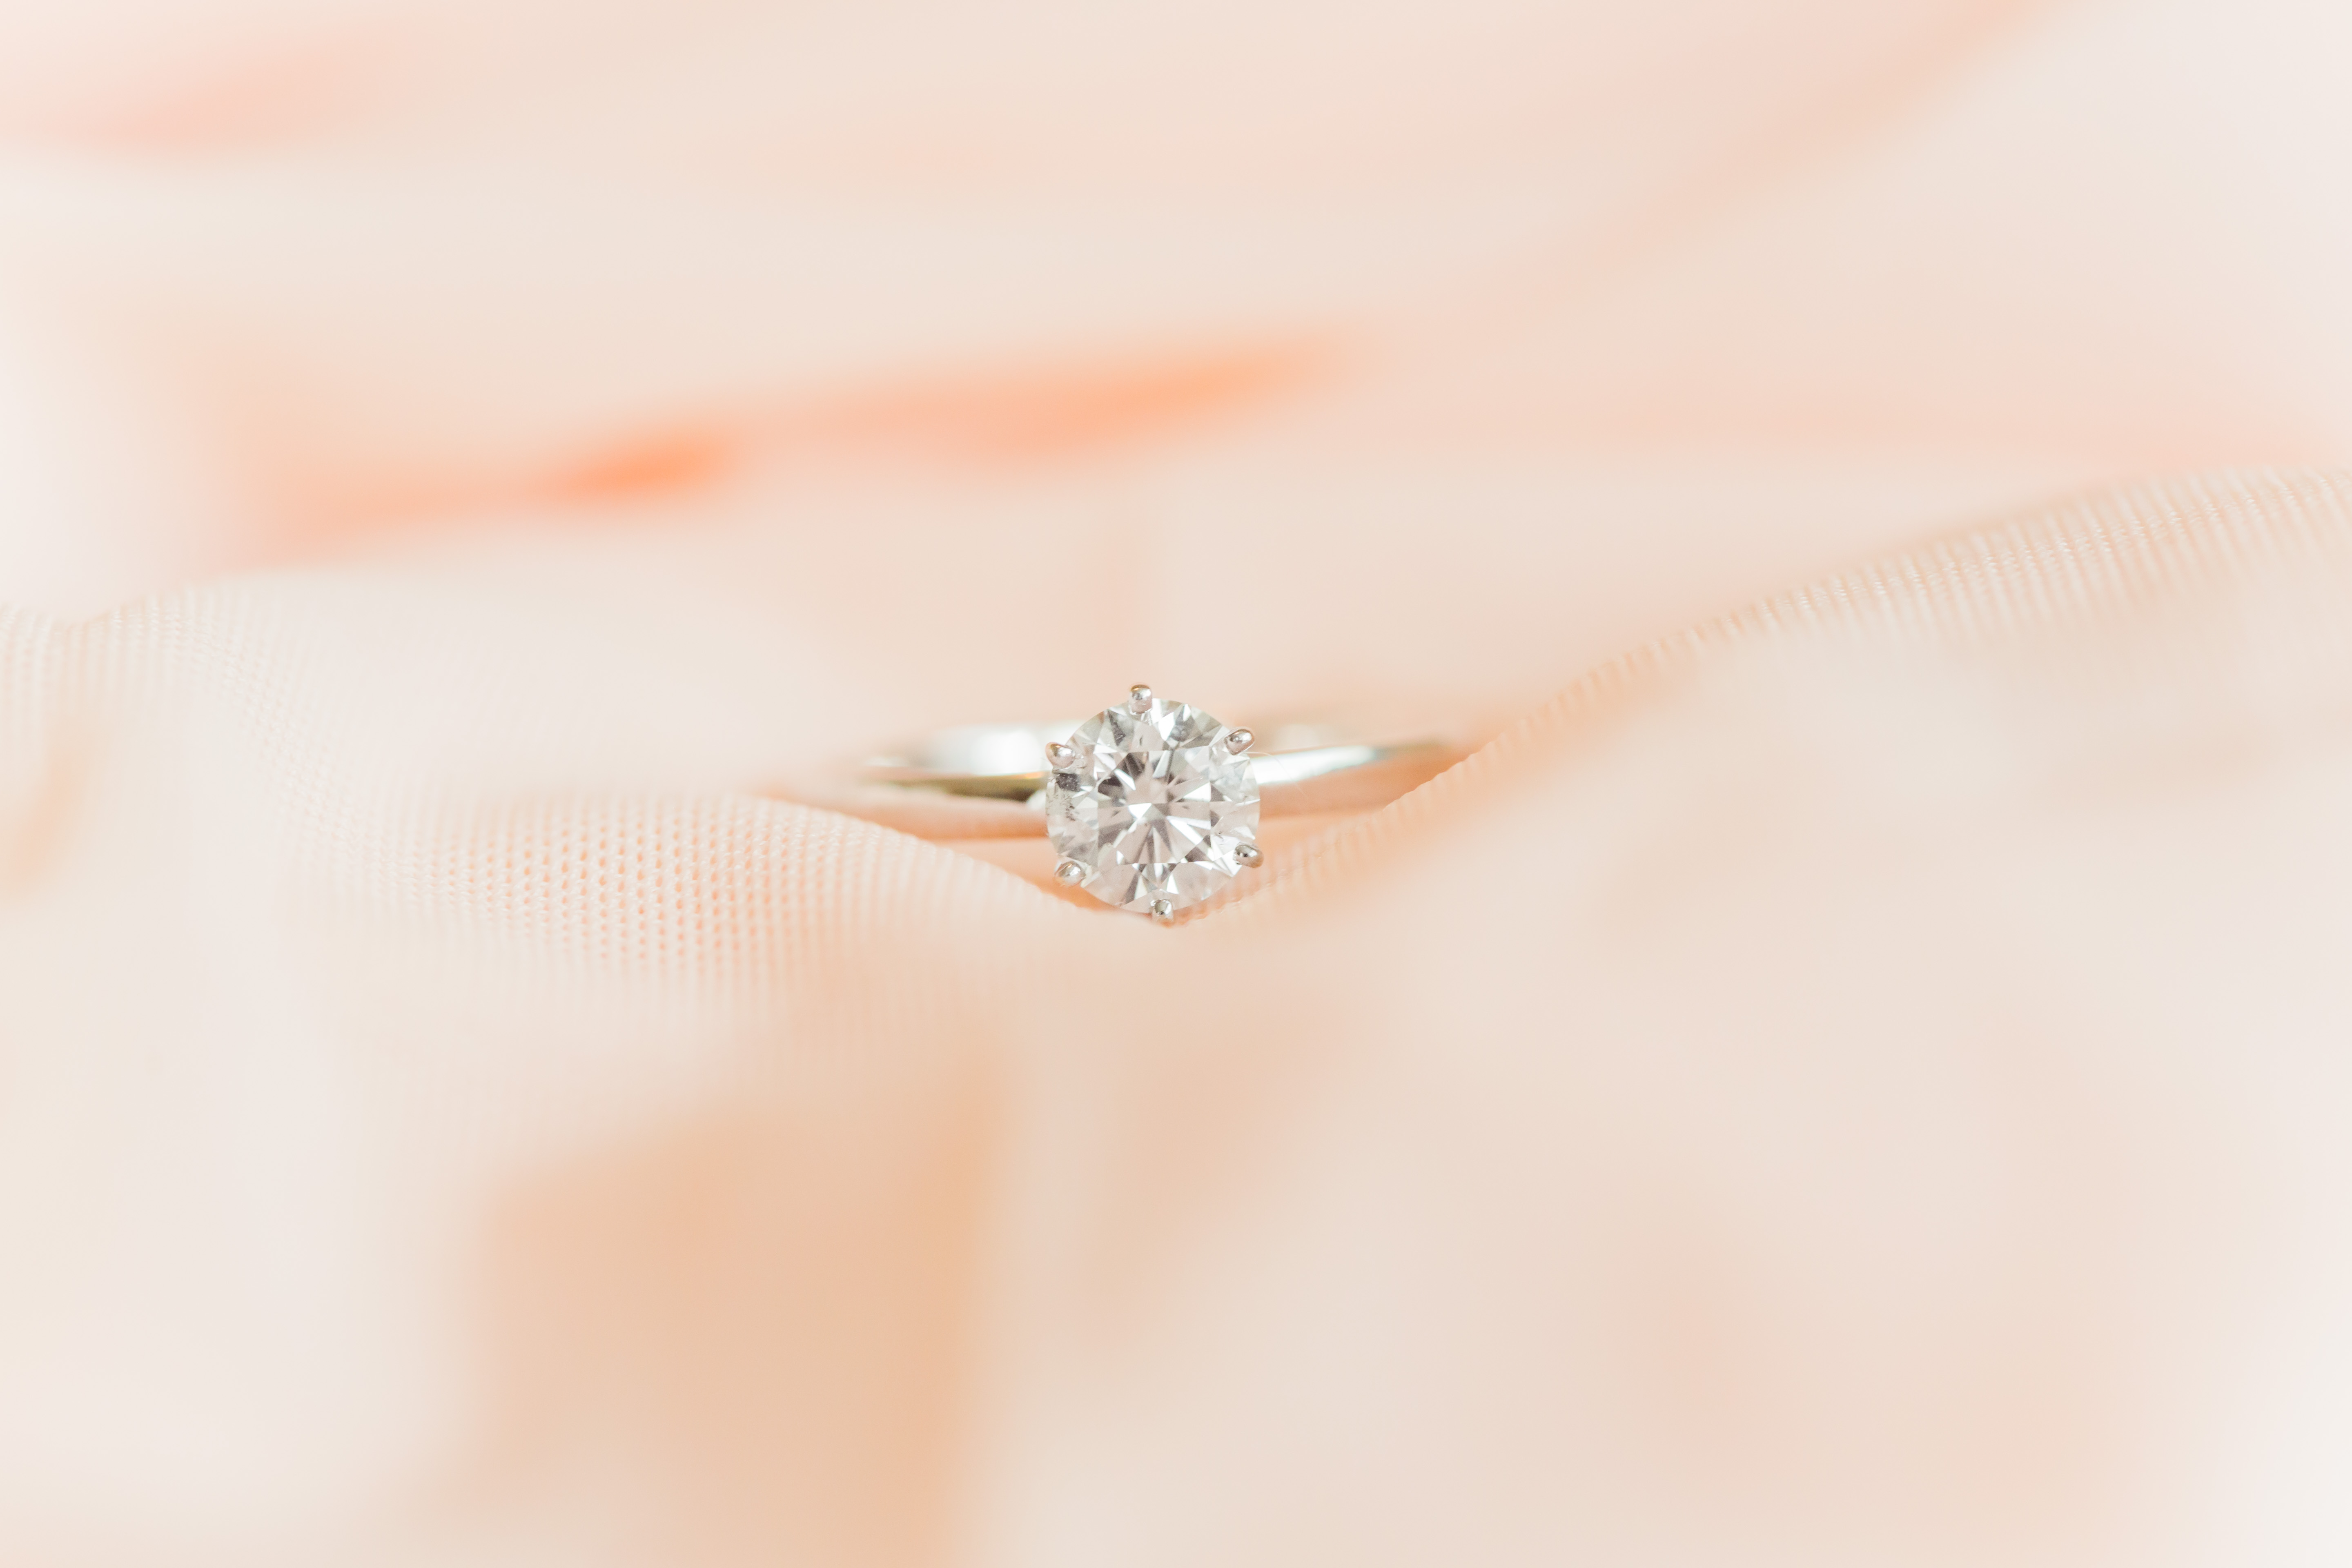
To balance out the shadows on the left side, we propped up a white envelope then added another to create a clean backdrop for our images. Yes, an envelope! It’s simple and clean and works like a charm!
Stylizing
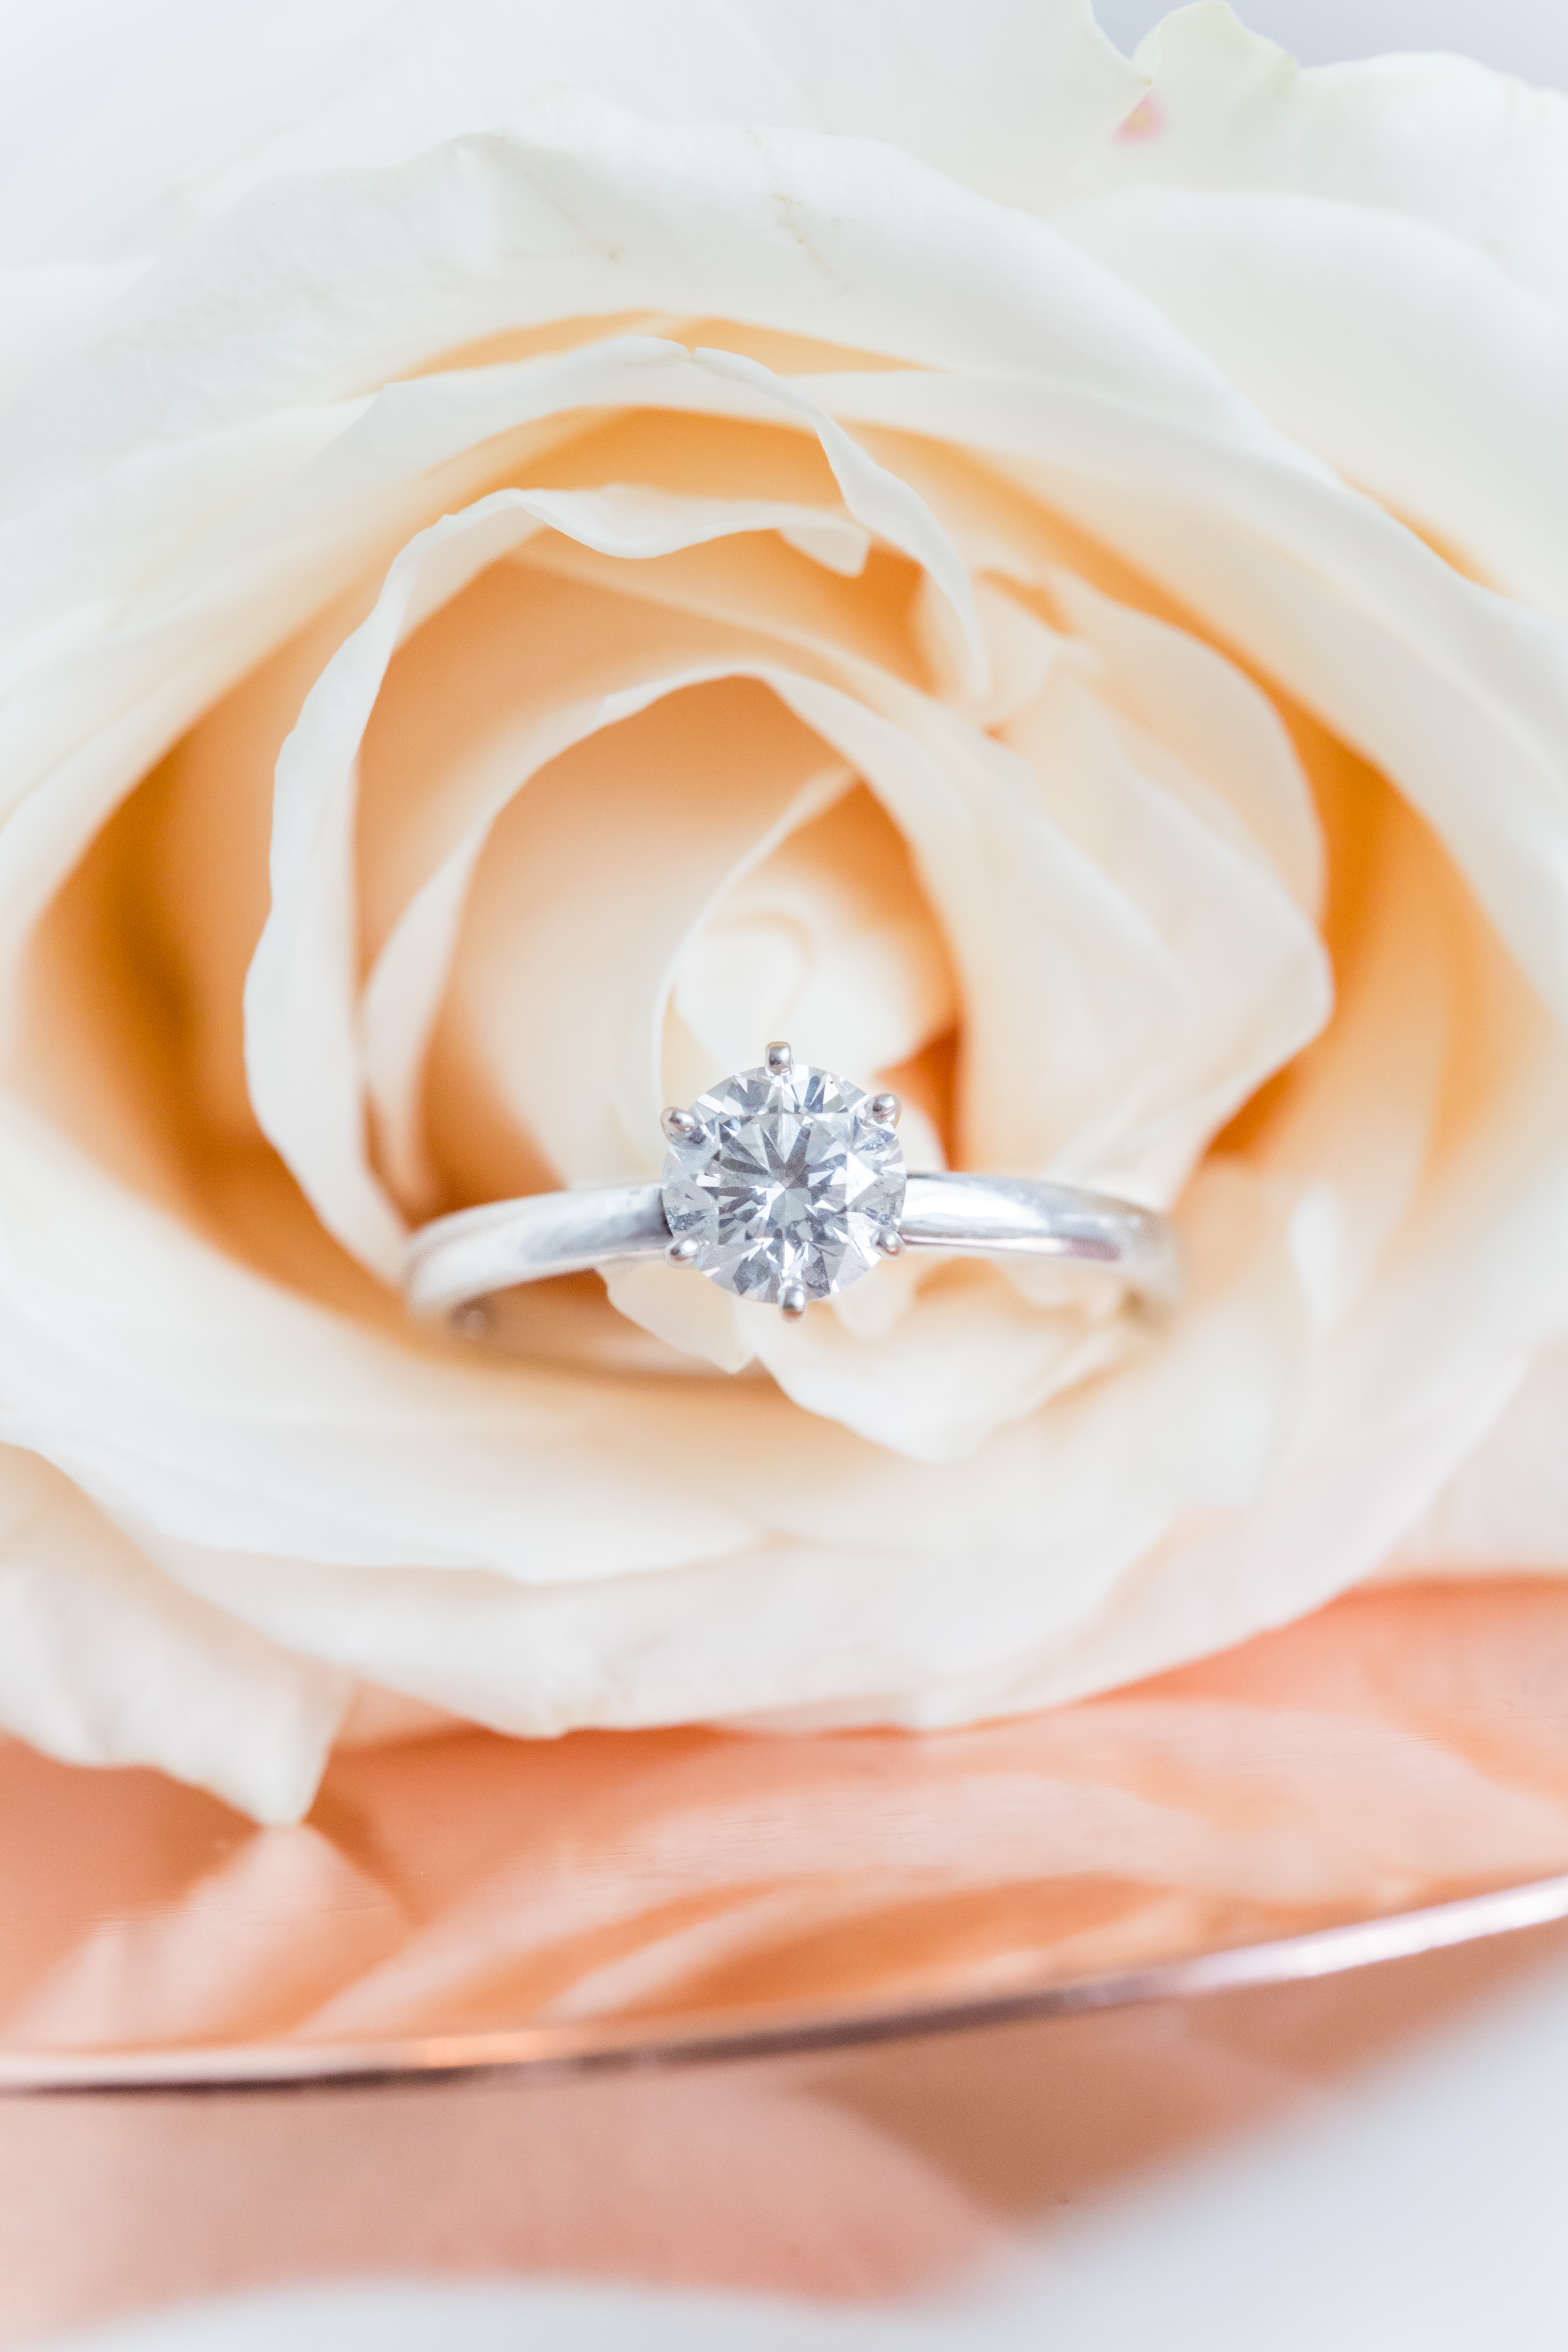
To style the image we added in a white rose and a small copper plate (the copper plate is actually the top to a candle, and proof that you can use things you find around the house or bridal suite). The second ring shot is taken on blush tulle. We love using a bridesmaid dress as a backdrop for the details because they photograph beautifully and help pull in the wedding color scheme which keeps our details consistent and always look great in blog posts.
Here’s how we styled the image: we used a white rose as a background for the ring, and placed the ring in the center of it (because that’s the key part of the image). Then we placed it all on a copper plate to add depth and reflection.
Shooting & Equipment
When it comes time to start taking detail shots, we shoot several variations; some with the ring inside the rose, some with the ring next to it, some with the ring in the center–you get the idea. A lot of the times it can be intimidating to photograph the rings (especially if you have 6 bridesmaids looking over your shoulder) and it’s easy to think that the second you’ve got the perfect ring shot you can close shop and call it a day. However, we encourage you to keep shooting, even after you “nail the shot”–it never hurts to try a few variations! We also recommend taking several horizontal and vertical shots as well. This way you’ll have several options when posting and pairing with other photos.
As for equipment we always, always, always, shoot the ring shots on a macro lens. We prefer the 100mm 2.8 Macro lens. We like to get on eye level of the details because it helps them come to life. Here are 3 tips we use when shooting details with our macro lens:
- Close Down the Aperture.
Getting used to shooting with a macro lens can be tricky. When you are super close to your subject, the focus can be difficult. So our first tip is to close down on that aperture. We always set ours to f/8 to begin and that usually does the trick. By doing so allows for a wider plane of focus–that way you can get the entire diamond in focus!
- Manual Focus.
This may be the only time we regularly use manual focus. We know it may not make sense at first, but it really is the best way to focus when using a macro lens. Everything is on such a small scale when photographing the rings; it’s kind of like its own little world. It can be incredibly difficult to get perfect focus when autofocus is being used, so once we have our details arranged and aperture closed down we switch to manual focus mode. This allows us to get clear and perfect focus on the tiny details of the ring.
- Take Your Time.
Like we said earlier, sometimes it is tempting to quickly snap a photo of the ring and call it good enough. In our experience this rarely, if EVER, makes for a good photograph. Make sure to give yourself some extra time in the schedule when it’s time for ring detail shots. Take a deep breath and enjoy it! Take multiple photos, ALWAYS be checking your focus, and mix up the angles and arrangement. We LOVE shooting the details, and the more you shoot and get the hang of it, the better you’ll become!
Practice practice practice!
Detail shots are actually the easiest of all shots to practice, because it’s just you and the rings. If you don’t have a macro lens we encourage you to borrow or rent one, (borrowedlenses.com is a phenomenal resource) and use your own ring or a friend’s ring to style, light and snap away! This is the best way to get better at ring details and a great way to fill your portfolios (even social media) with beautiful details!
We hope you can take these tips on How to Shoot Engagement Rings and begin taking the best detail photos you ever have!
[grwebform url=”https://app.getresponse.com/view_webform_v2.js?u=BoDF2&webforms_id=6059103″ css=”on” center=”off” center_margin=”200″/]
+ Comments
Leave a Reply


GET ON THE LIST
Hey, photographers! We're so happy you're here too and we can't wait to connect. Be sure to hop on our mailing list for exclusive educational content, to be among the first to know when announce workshop dates, and of course for the occasional #wittymixology tip!
Ring shots are one of my favorite images of tge day! Great tips!!
Thanks Misty! They are our favorite too! Thanks for the love!
Oh love this! Got some good pointers!
Thanks Hillary! You’re awesome!
Great tips! Thanks for sharing!
Thanks Rachel!
Great tutorial! I enjoyed reading, and getting a few new pointers! lovely work!
Thanks Karen!!
<3 Love ring shots and the mini reflectors/backdrop in the pullback!